


Hass.io Homeassistant Rfxtrx setup for LightwaveRF Devices

I like LightwaveRF, they make a very clever range of switches and inline dimmers which work in the UK.
For those of you who don’t know already in the UK our normal wiring setup is to run a (ring)main to all lights and then to send a separate cable from the light fitting down to a switch. This cable is for the sole purpose of adding a gap into the live wire to switch the light on and off.
In other countries a live, neutral (and earth) is often run to the switch itself and then from the switch to the light itself.
What this means is a lot of the home automation kit available in the world doesn’t play well with UK wiring as most switches require a minimum of live and neutral to work.
Enter LightwaveRF.
They have a very clever system whereby the current running through the system is used to power the switches using just 1 wire.
I will do a separate post on that concept if anyone is interested.
So, we have a system that works on UK wiring but it then introduces one of my pet peeeves. To be able to interact with your lights via the web or a smartphone you need to utilise their web link hardware which (guess what) requires an internet connection to work as it passes all info through their servers.
So if i’m sat in my front room and I want to turn off my light in the bedroom then I have to send a signal from my phone to a LightwaveRF server and then back to my house to do so.
For those who know me you will understand that I hate cloud services for mundane things that should just work. With LightwaveRF this is compounded somewhat but the fact I have to log in to their web portal to access my switches every time because if you remain logged in over night the buttons just stop working. Probably a session issue or something like that but anyway.
Enter rfxtrx433e from RFxcom
This little piece of hardware has two main purposes. It can send RF signals out given an instruction to do so and most importantly it can also listen for signals to RF devices and display those for you.
If you want to get into the real API side of RFXTRX then I would recommend checking out their user guide
So we can setup that little piece of hardware which can not only listen for RF signals being sent out but also send them for us. When paired with Hass.io or Homeassistant this enables us to easily control our LightwaveRF devices both directly without some cloud service I didn’t want and also as part of Homeassistant which allows us to utilise these LightwaveRF devices within the context of Homeassistant so we could for example detect when someone comes home and turn the lights on, or check the time and if it is 2am turn off the utility room light that was accidentally left on.
Anyway the point is i want to use LightwaveRF devices without a cloud server and be able to automate certain functions.
So to do that you need to do the following
Setup the RFXtrx433e to be able to speak to your LightwaveRF devices.
This sounds daft but out of the box the RFXtrx doesnt speak to LightwaveRF devices. We need to enable it to do so. To do this we need the RFXmngr software which you should be able to find here
Plug in your hardware open the RFXtrx manager application and you should see the following wonderfully colourful screen
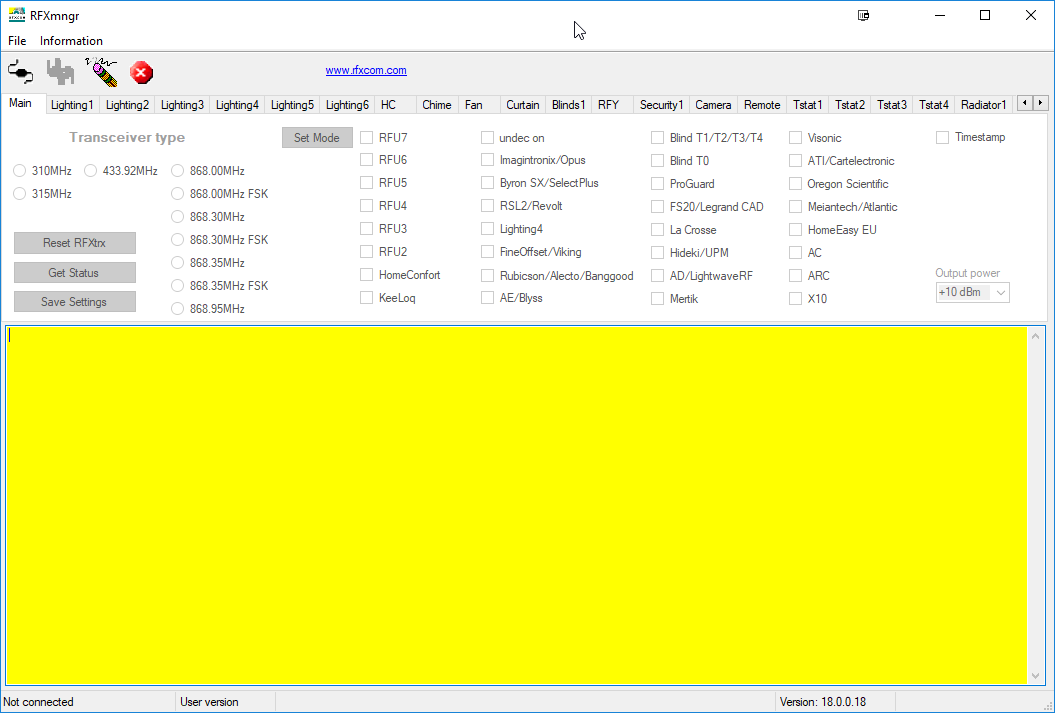
You need to click on the connect to RFcom device button top left choose the com port that coems up and click OK (if you are unsure just click OK as the default should work. it always has for me)
This outputs a list of the enabled and disabled functions on the RFXtrx and allows you to make changes and update it.
Under the Lighting5 tab at the top you will find the lightwaveRF tab where you can test commands directly. We will look at that in another post.
Under the “Main” tab you will see the enabled and disabled functions and can tick the AD/LightwaveRF box to enable that library/function on the RFXtrx
Once this is ticked you then click Set Mode and you are done. I also click Save Settings so these are saved for me in case my RFXtrx breaks and I need to reupdate a new one.
Plug in your RfxTRX to your Pi or other Hass.io setup and turn it on.
You should now eb able to see your RFXtrx within hass.io by using SSH and sending the following command.
hassio host hardware
This should output the connected and usable hardware on your device including an entry for serial (includes USB) devices similar to
"serial": [
 "/dev/ttyUSB0",
 "/dev/ttyAMA0"
 ],
We have two entries here. often the one you want will be named USB something so we will go with the first one being the correct one.
NOTE: this USB entry can change from time to time on reboot. We will cover setting a more permanent name later on using SSH into the root operating system instead of into Hassio.
OK so now we can actually setup the RFXtrx in the homassistant config file.
Open the configuration.yaml file and make a new entry as follows.
rfxtrx:
 device: /dev/ttyUSB0
 debug: True
This basically enables the RFXtrx in the configuration.
We then need to add some other entries depending on the individual devices we have. Switches and lights for example.
For this add the following
switch:
 platform: rfxtrx
 automatic_add: True

light:
 platform: rfxtrx
 automatic_add: True
This adds the facility for the RFXtrx to detect both lights and switches when they are triggered.
Save the config and restart Hassio and you have finished part one.
You now need to trigger each of the light switches or remotes that you have previously paired with the LightwaveRF devices you have.
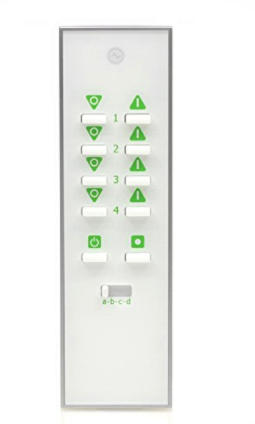
For example I have three inline dimmers in my office so I put them into pairing mode one at a time and paired them with one of the simple remotes that come with the LighwaveRF plug sockets
Then watching my Homeassistant home page I click the on button and Homeassistant automatically detects the unique ID for the device and displays it in a box on the homepage. Note that most lightwaverf devices show as switches whatever they actually are.
You can then test that it is working correctly by clicking the on off icons next to the newly detected devices.
Once you have the ID’s of all the devices you can then go back to your configuration file and add them under their relevant headings. For example my three dimmers were lights so i added them under the Lights section as follows
light:
 platform: rfxtrx
 automatic_add: True
 devices:
 0a1100000116e101010080:
 name: Office Spots 1
 0a1100030116e102010080:
 name: Office Spots 2
 0a1100010116e103010080:
 name: Office Pendant
And they now appear nicely under the lights section of my hassio dashboard.
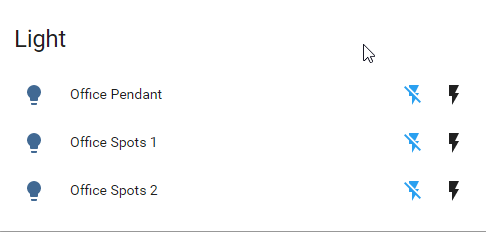
And because I added them as lights and not switches they are available with dimming capability if I click on them.
And we are done.


hey man, for whatever reason hassop host hardware is not working for me.. i get
Host hardware not found: 3(NXDOMAIN)
also ttyUSB0 aint working..
Sorry for the long delay. What is your hardware setup? is it on a RPI or docker or just a pc etc?
Hi, I’ve taken a look at Lightwverf. Just to make sure: you did replace the stock in-wall switches in your house/flat with these, right?
Hi, Yes. So long as you are in the UK or have UK style wiring,
One other thing to consider is making sure you have a minimum load on the circuit for it to work properly and specifically not flicker when turned off.
I had an issue where my kitchen lights flickered when i turned them off. This is because i had low power LED lights in my downlighters. there was not enough load on the circuit for the lightwave to function properly. see here https://support.lightwaverf.com/hc/en-us/articles/360007303911-LED-Compatibility-Charts
Sorry for asking what is probably obvious th the technical, but will this device take commands from the Lightwaverf hub?
Specifically somfy rts (which I believe it will control)
We have lightwave running 240v somfy motors but the rechargable rts would be ideal where we can’t hard wire.
Thanks for any advice
Hi, sorry for the massive delay. just in case you never got anywhere.
the RFXTRX replaces any hubs that send RF signals to other thigns. so you should be able to control your Somfy RTS using it also.